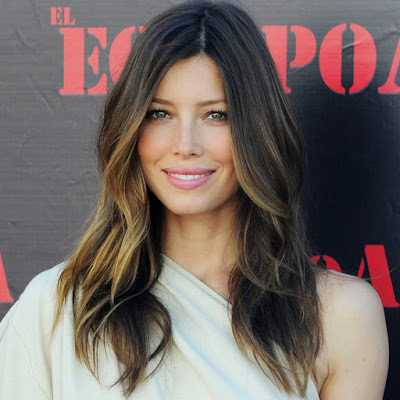
How To Create A Wavy Blowout...
I ran across this on realbeauty.com & wanted to share it with you!!
But looking like you didn't try too hard isn't as simple as it sounds. Luckily, Solano broke down the steps for scoring beachy waves, so you can easily attain this piece-y, bohemian hairdo at home. Check out the details below.
1. Pick Your Poison
Start by selecting the right type of product to create your ideal level of texture. "If you have fine to medium hair, use a mousse or cream because they're not as heavy," explains Solano. "Thicker hair needs a heavier product like a pomade or beach spray to provide more hold." Her formula of choice for all hair types is Shu Uemura Tasai Cream, because it can be layered according to your hair’s styling needs.2. Apply the Potion
Solano advises applying your texturizer to towel-dried hair, because it's more difficult to work with wet hair. If you want a more touseled mane, rough blow-dry (by shaking the nozzle at your roots) strands to dehydrate tresses before adding styling solutions. "Imagine that you just came out of the water and it's breezy out, so your hair starts to dry," she says. Work the product into your mane from back to front, spreading it from half-way down the length of your locks to the ends. Whatever is left on your hands can be sparingly applied to your roots if you’re aiming for a sleeker style.3. Twisted Times
Then, divide your hair into four to six sections and twist each by wrapping it around two to three fingers while you blow-dry. Make sure to point the dryer nozzle down on (instead of up at the hair) while you twist. If you opt to air dry your strands, follow the same instructions to tame your limp locks into big-coils. Once your hair is 80 percent dry, flip your head over and apply a bit more product. Then, scrunch your tresses and finish blow-drying (with your head still down) until all of the water has evaporated. "Keep your dryer on the medium setting because super-hot temperatures and high speeds will take away texture," says Solano. "Your blowout should not look so great right now, and that's perfect. If it's too smooth or shiny, it won't hold the curl."4. Parting Waves
To add instant volume, Solano suggests sporting a side part. "Make it deep in the front, but as you get towards the back, make it more central," she advises. "This distributes the weight of the hair, so it's even on both sides and looks full throughout."5. Create Coils
You’re not done yet! Starting two inches down from the roots, wrap two-inch chunks of hair around a clasp-free curling iron (Butterfly uses one by Enzo Milano). Hold the iron vertically, pointing towards the floor. "This curling technique creates more elongated coils, rather than Shirley Temple-like ones,” explains Solano. Start on one side, working towards the back, and repeat on the other half of your head.6. Final Touches
"Brush your waves out with a wide, flat brush once or twice to give your hair polish and fullness," says Solano. "It will break up your curls, but that's what you want." If the weather is wet, she suggests misting your 'do with hairspray; and if it's dry out, add a light coating of pomade for extra shine.


Comments
Post a Comment